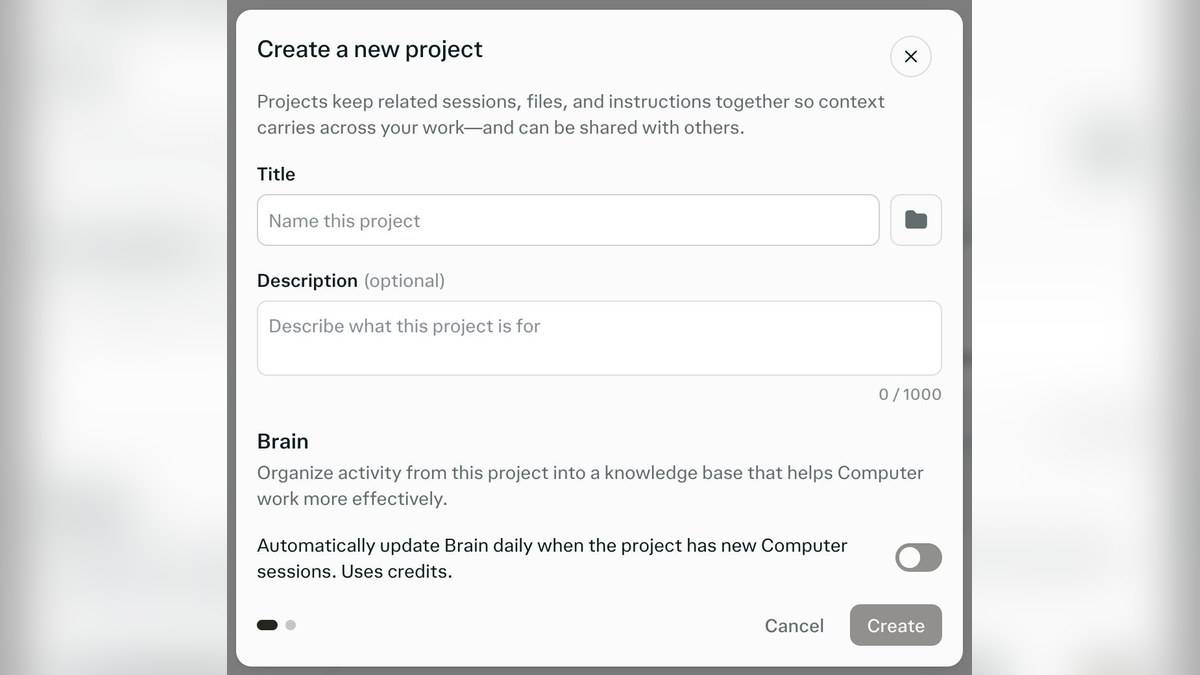
To use Perplexity Projects, open Projects in the left sidebar, select New project, give the workspace a title and add instructions in its settings. Use the Project to keep related research, files and conversations together. Before inviting anyone, decide which material belongs in a shared workspace and which people need editing access.
That is the setup described in Perplexity's current official Projects help page, checked on 11 November 2026 at 22:20 IST. Search suggestions still include Spaces, but this guide follows the current Projects documentation. The steps below were checked against that page without logging into an account or running a private workspace.
| Starting decision | Practical example |
|---|---|
| Purpose | Compare official postgraduate course information |
| Instructions | Separate verified facts from unanswered questions |
| Files | Keep clearly named versions of prospectuses |
| Access | Give reviewers the minimum role they need |
How to create a Perplexity Project
Perplexity documents a title limit of 50 characters, an optional description of up to 1,000 characters and instructions of up to 8,000 characters. These are current limits, not a recommendation to fill every field. A short title such as “Public university course shortlist” is easier to recognise than a paragraph describing the entire assignment.
Write a description that tells a future reader what the Project is meant to produce. For example: “A comparison of course eligibility, application requirements and unanswered questions, using official prospectuses.” That sentence gives the workspace a boundary. It also helps you decide whether a new question belongs there or deserves a separate Project.
The help page describes more than one settings layout. Some accounts show a Settings tab; the newer layout can show See all settings or a Configure project icon. Instructions and defaults appear under General in the newer layout, while files and links appear under Sources. Follow the labels visible in your account rather than expecting every screenshot to match.
What instructions should you put in a Project?
Start with an output you can inspect. Here is an original instruction for a student comparing courses: “Use official university documents for eligibility and application details. For each claim, identify the source and relevant section. Put missing information in a separate Questions to confirm column. Do not estimate a deadline that the source does not state.”
The purpose of that instruction is to make gaps visible. It cannot guarantee that the answer is correct. After receiving a comparison, open each cited document and check the sentence supporting the claim. A table that looks complete can still mix an old prospectus with a current one, so include the document year in your review.
For a group reading assignment, try: “Summarise the argument in 150 words, list three pieces of supporting evidence, and separate the author's conclusions from our questions.” This prompt asks for a manageable reading aid. It avoids asking the assistant to invent an assessment of a document you have not supplied.
For meeting preparation, another original prompt is: “Turn these notes into an agenda. Keep decisions already made separate from decisions still needed. Mark every proposed action as a proposal unless the notes explicitly record agreement.” Its purpose is to preserve the difference between a suggestion and an agreed commitment.
How to organise files and avoid stale evidence
Perplexity says files added from connected sources are copies: changing or deleting the original does not update the copy in the Project. That makes version checking part of the research process. A filename such as “Prospectus 2026 official download” is more informative than “final final document”. Record where the file came from and when you checked it.
An original review prompt can help: “List the documents used for this answer, their stated dates and any conflicting versions. If the date is absent, write date not stated.” Check the resulting list against the files yourself. The prompt is a way to organise a review, not evidence that the software has found every discrepancy.
Keep the final comparison narrow enough to verify. Reviewing five eligibility claims carefully is more useful than accepting a long answer containing dozens of unchecked details. If an answer cites a general university homepage for a specific course rule, ask for the exact prospectus passage before relying on it.
Check sharing before adding collaborators
The official page distinguishes owners, editors and viewers, and says Projects are private by default. Review those permissions before sharing material. For a reading group, ask whether a person needs to change source files or simply review the result. Keep the original documents separately so the group can compare the final output with its evidence.
For related workflows, read our guides to Perplexity research prompts, Deep Research limits and studying with NotebookLM. Choose the workflow that fits the task, then keep the same habit throughout: inspect the source before carrying a claim into your finished work.